
Kitchen Renovation Has Been Completed!
It has been a few months since we completed our kitchen renovation. I waited a while before writing this blog post because I wanted to use our new kitchen for a while and see what I liked and disliked about it and whether there are things I regret doing (or not doing).
After months of planning, we started the kitchen renovation on March 1st, 2021. It was officially completed in the first week of May, roughly within the expected completion time.
It has been quite an experience, not without bumps, but the result has been so worth it!
The Before kitchen
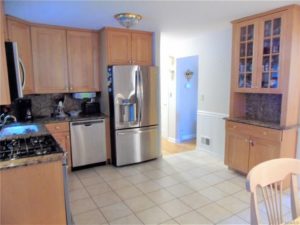
When we first moved into our new home in 2019 we knew one of our first projects will be renovating the kitchen. Our old kitchen had practically zero counter space and a bunch of odd or unusable storage spaces. If you look at the picture below you can easily tell that there are two corner cabinets, which were not used due to the awkward configuration. There was no vent to the outside, so the area above the stove was always greasy. The cabinet on the right had some completely unusable countertop. The light in the kitchen was not enough...
The project
After months of researching and trying different options and designs, we finally figured out the scope of the project. The major items on that list were: removing the wall between the kitchen and living room, changing the location of all appliances, and replacing all cabinets. We got a few quotes from contractors, architects, and cabinets suppliers, and we estimated that if we wanted to get all things on our wish list, we would spend approximately $40,000 - $50,000.
The major issue was we had to live in the house during the renovation, while both myself and my husband worked from home, full time. Did I mention we also were taking care of our 3 year-old-child, who was not yet in school?
Disclosure: The rest of the blog includes affiliate links and I will get a commission if you click and make a purchase. This is at no cost to you, of course.
We planned things extensively - we reconfigured one of our living spaces to become a temporary kitchen. We planned meals ahead of time. We froze a bunch of meals. We got a small hot plate and an Instant Pot, both from Amazon. We also purchase disposable plates and utensils, so we had to wash dishes as little as possible (which we have so much left that we are still using on occasions).
The contractor
The contractor we used was the recommended to us by the store where we ordered our kitchen cabinets. The crew was excellent and paid attention to small details, which was very important to me. The estimate and final bill was pretty close (the only extras we paid were for the changes in the project that we requested). I did get 3 more quotes from other contractors but we selected ours because they were very responsive, detailed oriented, and reasonable. They also helped a lot when things got "ugly" with our architect.
Demolition
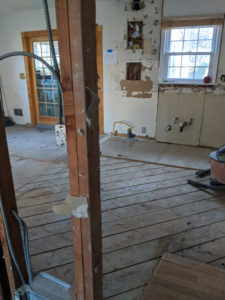
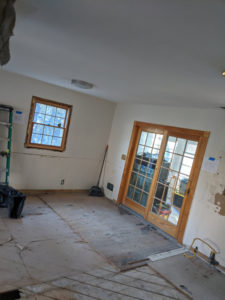
Demolition lasted less than a week. The demo crew did a great job sealing the space so the rest of the house would not get too much dust. Thankfully, we did not get any bad surprises underneath the old floors and walls.
Removing a supporting wall and selecting an architect
As expected the wall between the kitchen and living room was a supporting wall. Therefore, we budgeted a beam with a steel plate. This is where things got tricky and unpleasant.
My suggestion for anyone doing structural changes - find a good architect that is willing to pick up the phone when the construction starts! I made a bad choice with our "architect". The guy was recommended to us, so we asked him to make the drawings and submitted them to the town hall for approval. The approval of the permit took a couple of revisions, but it went fine eventually, which meant we were ready to begin our kitchen project.
As we finished the demolition, our contractor made a suggestion to change how the supporting beam is installed, which would make it sit higher and therefore have a better clearance. This change, however, meant the architectural drawings needed to be changed and resubmitted to the town hall. It also meant there was going to be a delay of 1-1.5 weeks. We accepted the delay and the extra fee to revise the drawing and decided to move forward with the change.
Well, good plan, but our architect was nowhere to be found. He was not even an architect, as it turns out. What I did not know at the time is that there is a database of all licensed/certified architects, where you can look people up. He was someone who makes drawings and gets them certified by an actual architect.
Anyways, after finally getting in touch with him he agreed to revise the drawing, for which we agreed on paying him an additional fee (that was expected, of course; who would work for free). Imagine our surprise when he served a bill that was 3 times higher, on top of which he also threatened us that he will call the town hall and tell them to stop our kitchen project and that he no longer certifies the drawings if we did not pay what he is asking for. That of course meant that we have to start the entire permit process all over!
Long story short, our incredible contractor jumped in and managed to negotiate with our "architect". He got issues resolved and managed to move the project along by doing other tasks and installing cabinets while waiting to close the issue with the beam. But our budget did get hit and our timeline ended up almost 4 weeks longer.
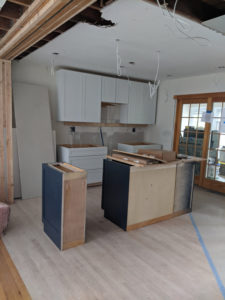
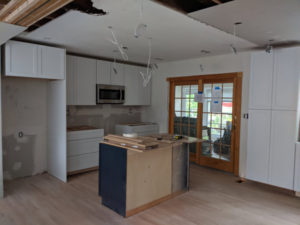
So close to the finish line
Once we closed all the walls, we expected things to move quickly. Unfortunately, one of the island panels and a drawer arrived damaged and we now had to wait a couple of more weeks for replacements to arrive and get them installed. Luckily the sink, dishwasher, stove, and microwave were in place and we were able to start using our kitchen.
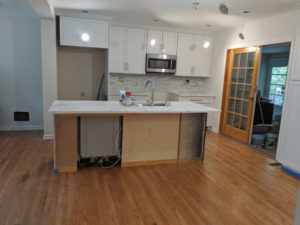
Renovation completed
And here is the completed kitchen. Ta-da!
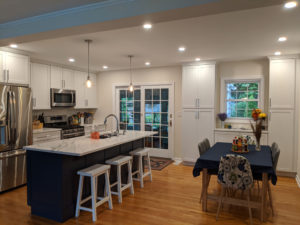
The island seating has been used for a minimum of one meal per day. I was concerned that the space will be a bit tight with having our dinner table there, but we have more than enough room.
We decided to go with simple island stools without a back to save some space. We got those from Amazon:
I love the look of them, although I wish they rounded the corners of the seats a bit more. Pottery barn has similar-looking ones that are a bit more sturdy and comfortable (thought 3 times the cost) and I might upgrade at some point in the future.
The kitchen countertops and backsplash
I loved the look of marble, but my research showed that it required a lot of maintenance, and that it chips and scratches easily. So, I chose quartz countertops for our kitchen because of their low maintenance, durability, and resistance to staining. After comparing a few, we went with white quartz countertops with gray veins, which looked very modern and were going to provide a great contrast with our dark blue island. The quartz countertops where ordered through the kitchen store, which provided plenty of samples to look at and choose from.
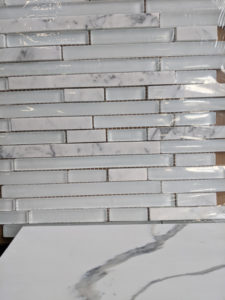
I ordered the backsplash from The Tile Store:
The cabinets
The white cabinets we got from Kraftmaid:
- Color: Dove Suede
- Style: Lyndale
The blue island cabinets we got from Starmark:
- Color: Blueberry
- Style: Bridgeport
Here is the reason why we went with two different brands. Kraftmaid had a blue color cabinets, however, the blue was just too dark, and in our house it looked almost black. There was a tiny difference in the cabinet style - the edges on the shaker are slightly deeper and sharper on the Starmark. However, you would need to look at it under a microscope to notice, and to me, the blue Starmark color looked much nicer in our space. It has been six months since we have been using these cabinets. The soft-close feature is incredible and makes such a huge difference. Quick warning - you get used to "slamming" the cabinet doors and drawers with no consequence pretty quickly - we went to an Airbnb, which did not have soft-close cabinets in the kitchen, and I was slamming the doors like crazy waking everyone up in the morning.
The cabinets upgrades
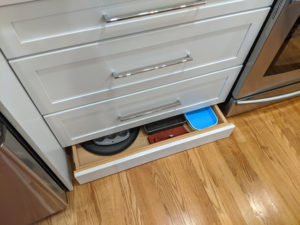
The first upgrade we did was toe kick drawers (see below). I am so happy we got them because our kitchen is small and it gives us extra space for trays and small plates.
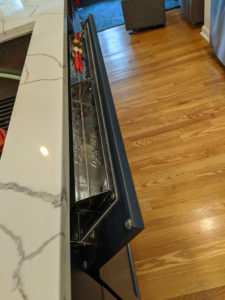
The next upgrade was this hidden space for the kitchen sponges and brushes. This one I could have lived without. It is a bit awkward to open and close it, so I mostly use it for keeping spare brushes and sponges.
The cabinets hardware
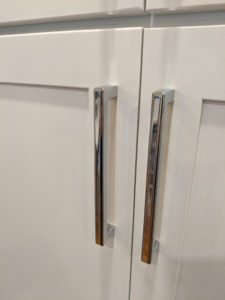
The hardware I picked was Top Knobs Podium style in chrome. I chose chrome because it added a little bit of shiny girly bling to our kitchen. Also, I decided to match the hardware to the the faucet, which was also chrome. I was not a 100% sure on whether the hardware should match the faucet or the appliances. However, looking at the completed kitchen now, matching the hardware and faucet was definitely the right choice. We ordered them directly from our kitchen cabinet supplier as they offered a better price. However, they are available here: https://www.build.com/product/summary/1112859?uid=2667269.
Sink and faucet
The sink we got was the 30 inch Kraus (stainless steel): https://amzn.to/3vEaNVe. We previously had the same size sink, but it was white ceramic. Replacing the ceramic sink with exactly the same one we had before was going to cost about $1,000. While the stainless steel option was more affordable and looked more modern. I love our new sink - it is deeper than our old sink and it is very easy to clean.
Because the drain is off to the side of the sink, it makes things much easier when washing larger dishes - our previous sink drain was in the middle, so washing pans and pots would cover it and make the dirty water pool, which was very annoying. The sink slopes gently so it prevents the water from pooling. One thing you have to keep in mind when choosing a sink with a drain on the side is the type of garbage disposal you buy. Some are very bulky and might not fit. We got the Everbilt garbage disposal from Home Depot (see link below), which fit perfectly.
The only thing I would consider a downside is the fact that when the water hits the stainless steel sink the noise is louder than the ceramic one. The white ceramic sink we had before used to scratch a lot more and it was more difficult to clean, so I'm happy with our current choice so far.
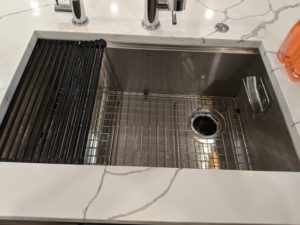
I am still not entirely sure how I feel about the bottom grid, which is supposed to protect the sink surface. It is hard to clean it quickly. I might take it off eventually. But I love that the sink came with a roll-up dish drying rack and bamboo cutting board that fits exactly over the sink.
Update: It's been 3 years now and I find the bottom grid mesh quite helpful. I do scrub it with a brush every couple of days to get the gunk off.
The faucet I got from Lowes called Delta Trask and comes with a pull-down spray wand. We love it so far! Its height is super convenient when you have to wash deeper dishes and my daughter loves washing her hands with the sprayer.
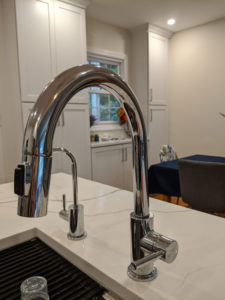
Hot water tap
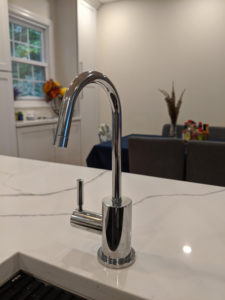
A hot water tap was recommended by my mother-in-law. I decided to add it to our wish list but I was not sure we would use it a lot. Well, it is amazing! If you drink tea it is a must-have - no more waiting for the kettle to boil. Not needing a kettle also saves us some counter space. Cooking pasta or boiling potatoes takes a shorter time now that the water is already hot. We got ours from Amazon: https://amzn.to/3vAe0ou.
Here is also how much room you must sacrifice below the sink for the hot water tap tank:
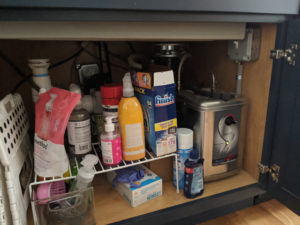
Right behind the tank we also have the garbage disposal, which I got from Home Depot. It is much quieter than our old garbage disposal and it takes very little room.
The lights
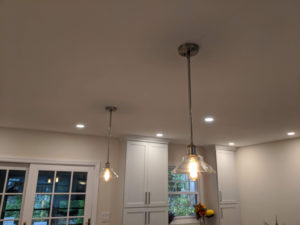
Our old kitchen was so dark, so great lights were a must-have. We got pendant lights from Amazon (Brand: Innovations): https://amzn.to/2XCkBSZ. We love how they look. Since it is a small kitchen we chose pendant lights that are see-through, so they do not block the view. We also installed under-counter lights and many recess lights throughout the ceiling. We decided against having a pendant light fixture above the kitchen table, as it looked a bit cluttered.
Appliances
We actually did not change the appliances since they were relatively new. Ideally, I would have preferred a counter-depth refrigerator, so it does not stick out but we were running way over budget at this stage.
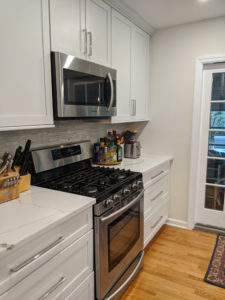
We did get a couple of smaller alliances for the kitchen - a Cuisinart toaster (I do not understand how I have lived for 30 years without one) and a Nespresso coffee machine.
So there it is! It took a couple of difficult months to get through the renovation, but the improvements have made a significant change in our lives and we enjoy cooking and meal times a lot more.